
Installing an air conditioning system in your home doesn’t just cool the place down; it utterly transforms your living space into a sanctuary of comfort, even amidst the searing heat of summer.
Now, you might reckon that fitting an air conditioner is a bit out of your depth, something not to be tackled without a professional by your side. Yet with a dash of precise electrical and plumbing savvy, taking on this DIY project becomes entirely within reach.
It’s true that no two air conditioning units are quite the same, yet by adhering closely to the guidelines specifically crafted for its design, you can ensure it operates both efficiently and correctly.
At Alfa Airconditioning, we’ve long been at the forefront of cutting-edge HVAC technology since our doors opened back in 2005. Our founder and lead engineer, John Wong, comes armed with over a quarter-century worth of experience in evolving technologies designed to simplify both installation and ongoing maintenance for these crucial systems.
With our expert advice at hand, stepping into aircon installation becomes as breezy as ever. So let’s get started!
Key Takeaways
- Picking the right spot for both indoor and outdoor units is key. It makes sure your aircon works well and stays safe.
- Secure mounting and correct installation of brackets, units, and wiring prevent future problems and ensure the system runs smoothly.
- Sealing gaps and insulating pipes keep your home comfortable without wasting energy.
- Regular cleaning and maintenance like changing air filters every three months help avoid common issues.
- Safety first: Turn off power before starting, use protective gear, and follow local laws to prevent accidents during installation.
Choosing the Ideal Location for Your Aircon
We always make sure to pick the right spot for our aircon. It needs to be at least 7 feet high on your wall. This way, it stays out of direct sunlight and away from any heat sources or gas leaks.
We also keep it clear, with about 6 inches of open space around its sides and top for airflow.
For the outdoor unit, placing it within 50 feet (15 m) of the inside one works best. It should have at least a 12-inch (30 cm) gap all around so air can move freely. We avoid putting it in busy, dusty, or very hot spots to keep it running smoothly.
Preparing the Site for Aircon Installation
We pick strong walls to hold the indoor part of the aircon. This stops it from falling. Sometimes, we need to make the wall stronger for this. Next, we work on where the outdoor part will sit.
We pour a level concrete pad on solid ground for it to rest on. We also put rubber pads under this outdoor unit to keep it quiet when it runs.
For connecting both parts, we drill a 3-inch hole through the wall for pipes and wires. This lets us hook up everything without messy cables lying around. Prepping like this makes sure your aircon works well and stays safe.
Installing the Aircon Mounting Bracket
We start by securing the mounting plate to an interior wall. Our team chooses a spot with studs behind it, ensuring the bracket will hold up well. We use tapping screws and plastic anchors for this job.
Making sure everything is straight, we take out our level. It’s crucial that the mounting plate sits perfectly horizontal.
The location for this plate needs care in choosing; it must be over 1 metre from any aerials or electric lines to avoid interference and hazards. This step sets a strong foundation for the aircon unit; getting it right means fewer problems down the road.
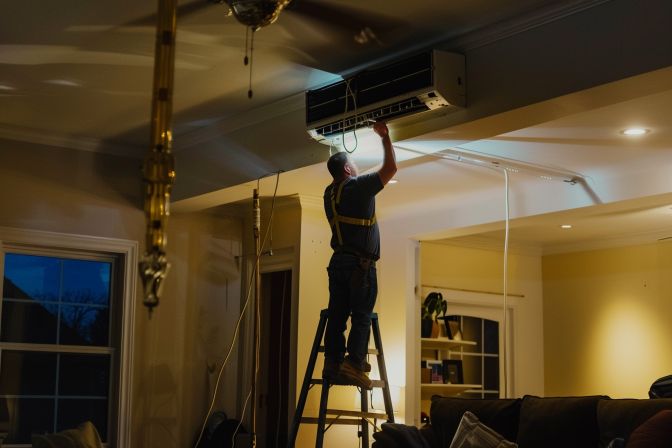
Mounting the Indoor Aircon Unit
We carefully align the female connections on the indoor unit’s back with the male connections on the mounting plate. This ensures a secure fit. Pressing firmly, we make sure the aircon unit locks into place properly.
It’s crucial to check for a slight backward tilt in the mounted unit too. This angle helps water flow out correctly, preventing any leakage inside.
Next, we guide pipes and cables through a pre-drilled hole in the wall. We take care not to bend these excessively as it can lead to poor drainage or blockage issues later on. Making sure everything is neatly tucked away ensures your aircon system runs smoothly without any hiccups from improperly aligned or bent ductwork.
Setting Up the Outdoor Aircon Unit

We find the perfect spot for the outdoor aircon part. It needs a level concrete base, not touching the ground, to avoid dirt and water. We put it far from too much heat or places where many people walk.
This helps it work well without getting dirty fast. Next, we use anchor bolts to make sure it stays put on this base. This way, the unit is safe and won’t move around. Our focus is on making everything secure and placing the unit in just the right spot for best performance.
Connecting Refrigerant Lines and Electrical Cables

We start connecting the refrigerant lines and electrical cables after setting up both indoor and outdoor units. First, we match the electrical connections to the wiring diagram provided.
This step ensures that power reaches the system correctly. Using flare nuts, we then attach copper tubes to the outdoor aircon unit. These tubes carry refrigerant necessary for cooling.
Next, we run these pipes and cables through a hole in the wall made earlier. It’s crucial to secure them with clamps and wrap everything tightly with electrical tape; this prevents any loose connections or possible damage over time.
Each action is precise, aimed at enhancing efficiency while ensuring safety standards are met without fail.
Testing the Aircon System
We check all joints and valves for leaks to make sure the system works well. A vacuum pump pulls out air and moisture, reaching an absolute vacuum of 10mm Hg. This step is crucial for the smooth running of your aircon.
Next, we secure all electrical connections according to the wiring diagram. This ensures everything powers up as it should, avoiding any surprises. The power supply checks are a final touch, confirming that your new aircon is ready to cool your home safely and efficiently.
Enhancing Aircon Installation
To make your aircon work better, seal every gap and check all parts are right. Clean up the area after you’re done to keep things neat.
Seal and Insulate All Gaps
We always seal the hole in the wall with expandable polyurethane foam. This stops hot air or bugs from getting inside. We also wrap insulating covers and tape around the pipes that connect the inside and outside units.
It’s crucial for keeping everything running smoothly.
Insulating these tubes is key to making sure your cooling system works well. It keeps your home comfortable without wasting energy. So, we take extra care here, ensuring every gap is sealed tight and all insulation is in place.
Conduct Final Checks and Adjustments
We make sure the outdoor unit is free from debris. This step ensures air flow isn’t blocked. Next, we turn on the system using the indoor control panel to see if it operates right.
We refer to the manual for any necessary tweaks. Our last step involves a visual check for loose connections or leaks. This way, everything runs smoothly without trouble.
Clean Up After Aircon Installation
We take out all debris and tools from the site. We make sure nothing blocks the airflow around both indoor and outdoor units. All packaging materials go to recycling or proper disposal.
The space near the outdoor condenser gets a thorough cleaning to stop future debris build-up.
Maintenance Tips for Aircon Longevity
We always swap out air filters every three months. This simple act ensures that our air conditioning systems run smoothly, keeping the air clean and reducing strain on the unit. Regularly checking the outdoor condenser unit for trash or any blockages is crucial as well.
These steps help prevent common aircon problems like short cycling.
Every year, we schedule a professional check-up for our HVAC system to catch any issues early. It’s important to have experts look over refrigerant levels and inspect evaporator coils for signs of wear or damage.
Choosing an AC unit that fits your space perfectly also plays a big role in how long it lasts and how efficiently it works, ensuring energy savings in the long run.
Safety Guidelines for Aircon Installation
We always stress the importance of safety first. Keep wires away from the compressor, refrigerant pipes, and moving fan parts during installation. It’s crucial to follow all local laws and the instructions given by the maker.
In Europe, only a certified F-Gas engineer can do this work. Some companies won’t honor their warranty if a licensed professional hasn’t installed the system.
Always turn off power at the fuse box before starting work to prevent electrical shocks. Use protective gear like gloves and goggles to avoid injuries. Make sure there’s no moisture near electrical connections – it could lead to serious problems.
By following these steps, we ensure our installations are safe and meet high standards. This approach helps prevent accidents and keeps your air conditioning system running smoothly for years.
Conclusion
Our guide lays out each step for air conditioner installation. It’s clear—picking the right spot, prepping it, and carefully installing units makes a huge difference. Follow our steps to ensure your system runs well.
Experience any issues? Don’t hesitate to reach out. Alfa Aircon is here to help. For more tips or service needs, email us at hello@alfraairconditioning.com.
FAQs
1. How do we install a split system air conditioner?
First, choose the right spot on your wall. Drill holes for mounting. Connect electrical wires and tubing between indoor and outdoor units. Make sure it’s done safely—best to have an electrician check it.
2. What tools do we need for aircon installation?
We’ll need drills, screwdrivers, vacuum cleaners for cleaning out ducts, and gauges for refrigerant levels. Don’t forget safety gear!
3. Can we clean the air filters ourselves?
Yes! Turn off the unit first. Pull out the dirty air filter gently. Use a vacuum cleaner to remove dust or wash it if it’s very dirty.
4. Why is my aircon making unusual noises?
It could be from loose parts, a refrigerant leak, or something stuck in the condenser coil—time to inspect carefully.
5. When should we call Alfa Aircon for servicing?
If you notice poor climate control, humidity issues inside, or if your central air conditioning system stops working efficiently even after basic troubleshooting.
6.Explain how regular maintenance helps our HVAC unit last longer.
Cleaning filters prevent mildew growth and ensure good airflow; checking circuit breakers and wiring keeps everything running smoothly; regular inspections can catch issues like refrigerant leaks early on.
For reliable installations and top-notch service,, contact us at hello@alfraairconditioning.com